Step by Step SSK Tutorial
- Shaina Scott
- Aug 20, 2019
- 2 min read
Hello!
This week I’m continuing the tutorials for some basic knitting stitches by adding the SSK (slip-slip-knit) to the line-up! This stitch creates a left-leaning decrease that will take you from 2 to 1 stitches. It’s pretty simple, but when I was a beginner it was really confusing for me because I couldn’t find an actual explanation of how to work the stitch. Thank God for knitting classes, lol! I may have never figured it out otherwise. 😂
In this tutorial you'll notice that I'm slipping both stitches knit-wise before working them together. There is an alternative method where you slip the first stitch knitwise and then you slip the second stitch purlwise before working them together. Proponents of the second method claim that it makes the stitch lie flatter against the fabric. It can, but since this is a basic tutorial I just wanted to show the most widely-used method for working an SSK. That way if you're asking for help from your local yarn shop or knitting friends they won't be confused.
Happy knitting!
Shaina ^_^
PS: The yarn featured in this tutorial is T & H Fiber Works' Angel Song in the Mantis Shrimp Colorway & I'm knitting on the Kelp Shawl.
Materials:
A knitting project or swatch with stitches live on the needles
Knitting needles appropriate for your yarn
Step 1:
Work to the point where you want to place your SSK.
Step 2:
Insert the right needle knitwise into the first stitch on the left needle...
Step 3:
Slip this stitch off the left needle and onto the right without working it.
Step 4:
Insert the right needle knitwise into the first stitch on the left needle...
Step 5:
Slip this stitch off the left needle and onto the right without working it.
Step 6:
Insert left needle through the 2 stitches you just slipped...
Step 7:
Using the right needle, knit a stitch through the 2 slipped stitches.
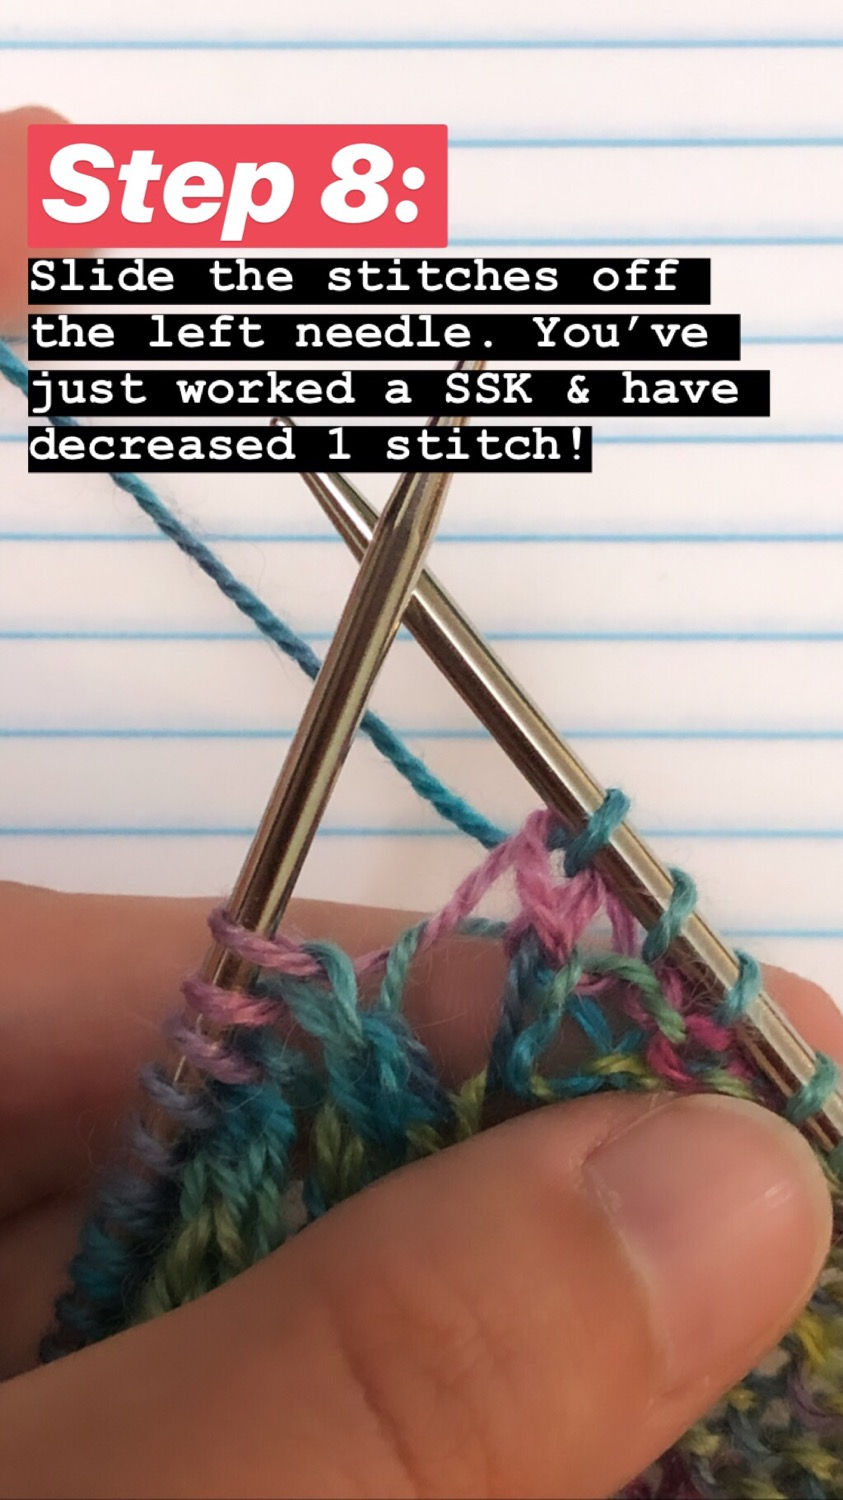
Step 8:
Slide the stitches off the left needle. You've just worked a SSK & have decreased 1 stitch!
Try It Out!
It's best to put a new technique into practice right away so that you can remember it in the future. Here are some of my patterns that are perfect for practicing this technique.


Comments