
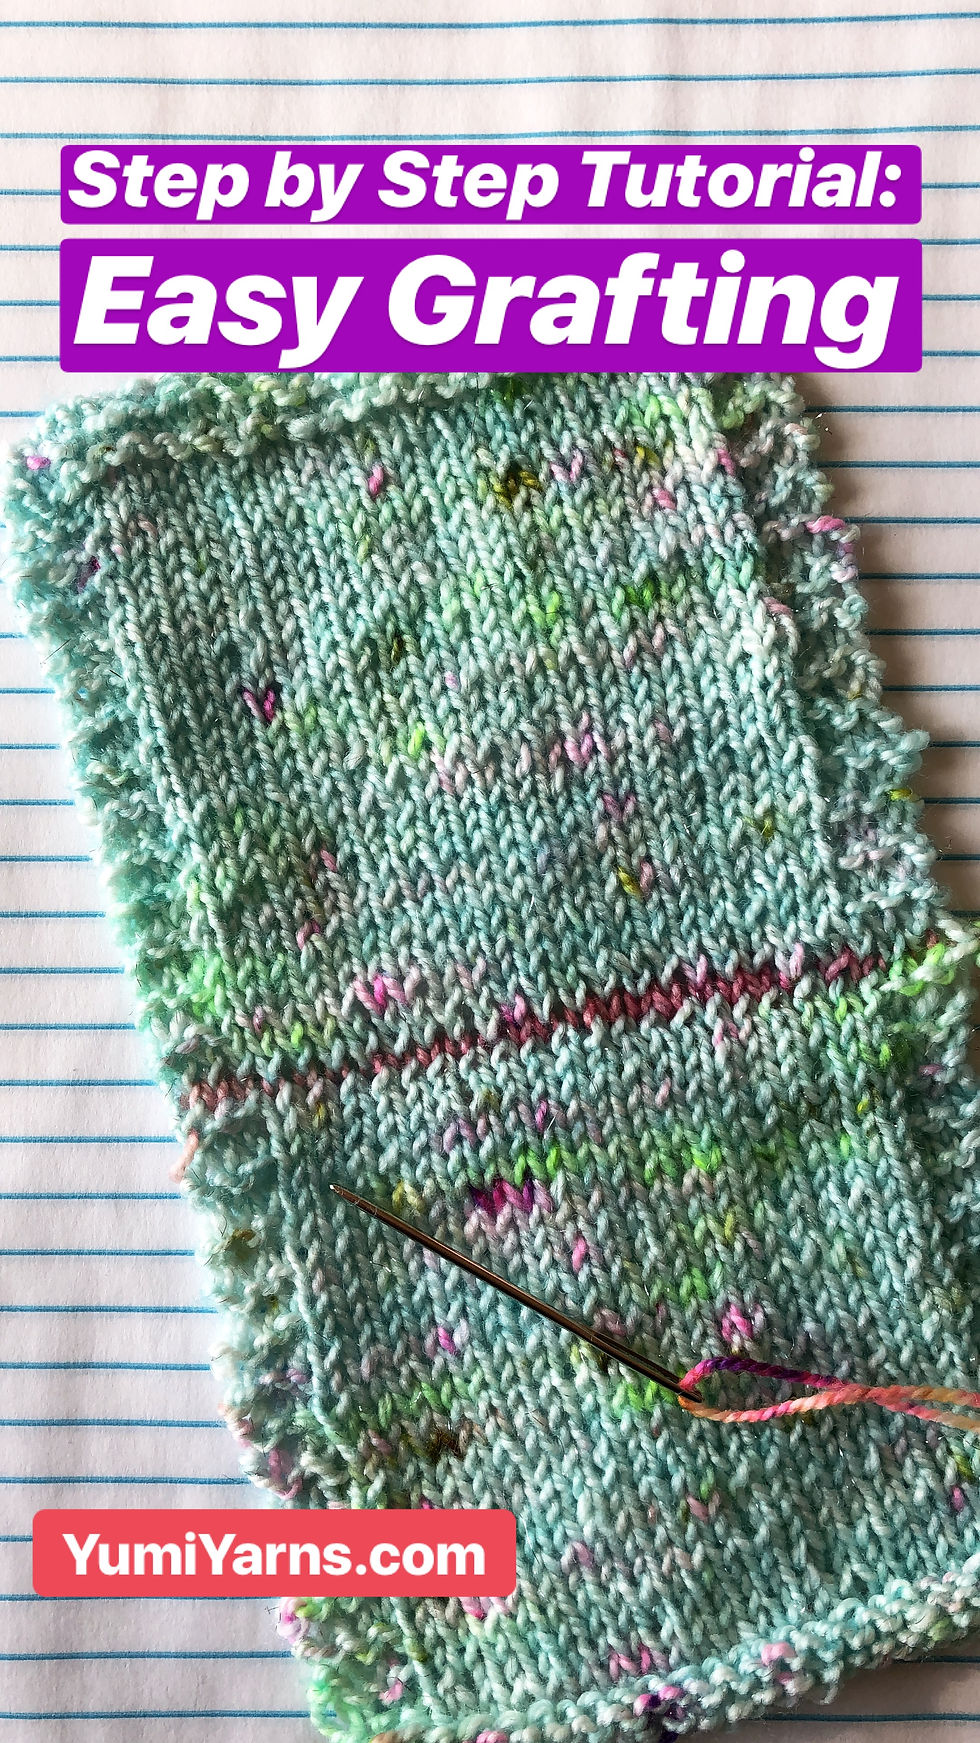
Step by Step Tutorial: Easy Grafting/Kitchener Stitch
- Shaina Scott (@YumiYarns)
- Apr 7, 2018
- 3 min read
Hello!
I don't know about you, but memorizing the Kitchener Stitch (aka: Grafting) has been one of the most difficult knitting skills for me. I finally found a way that makes sense in my brain so I've made a tutorial for you and included the tips that I keep in mind while stitching to ensure an even fabric. (Even if you have a 4-year-old and a husband vying for your attention while you're attempting to finish your project.)
Supplies Needed:
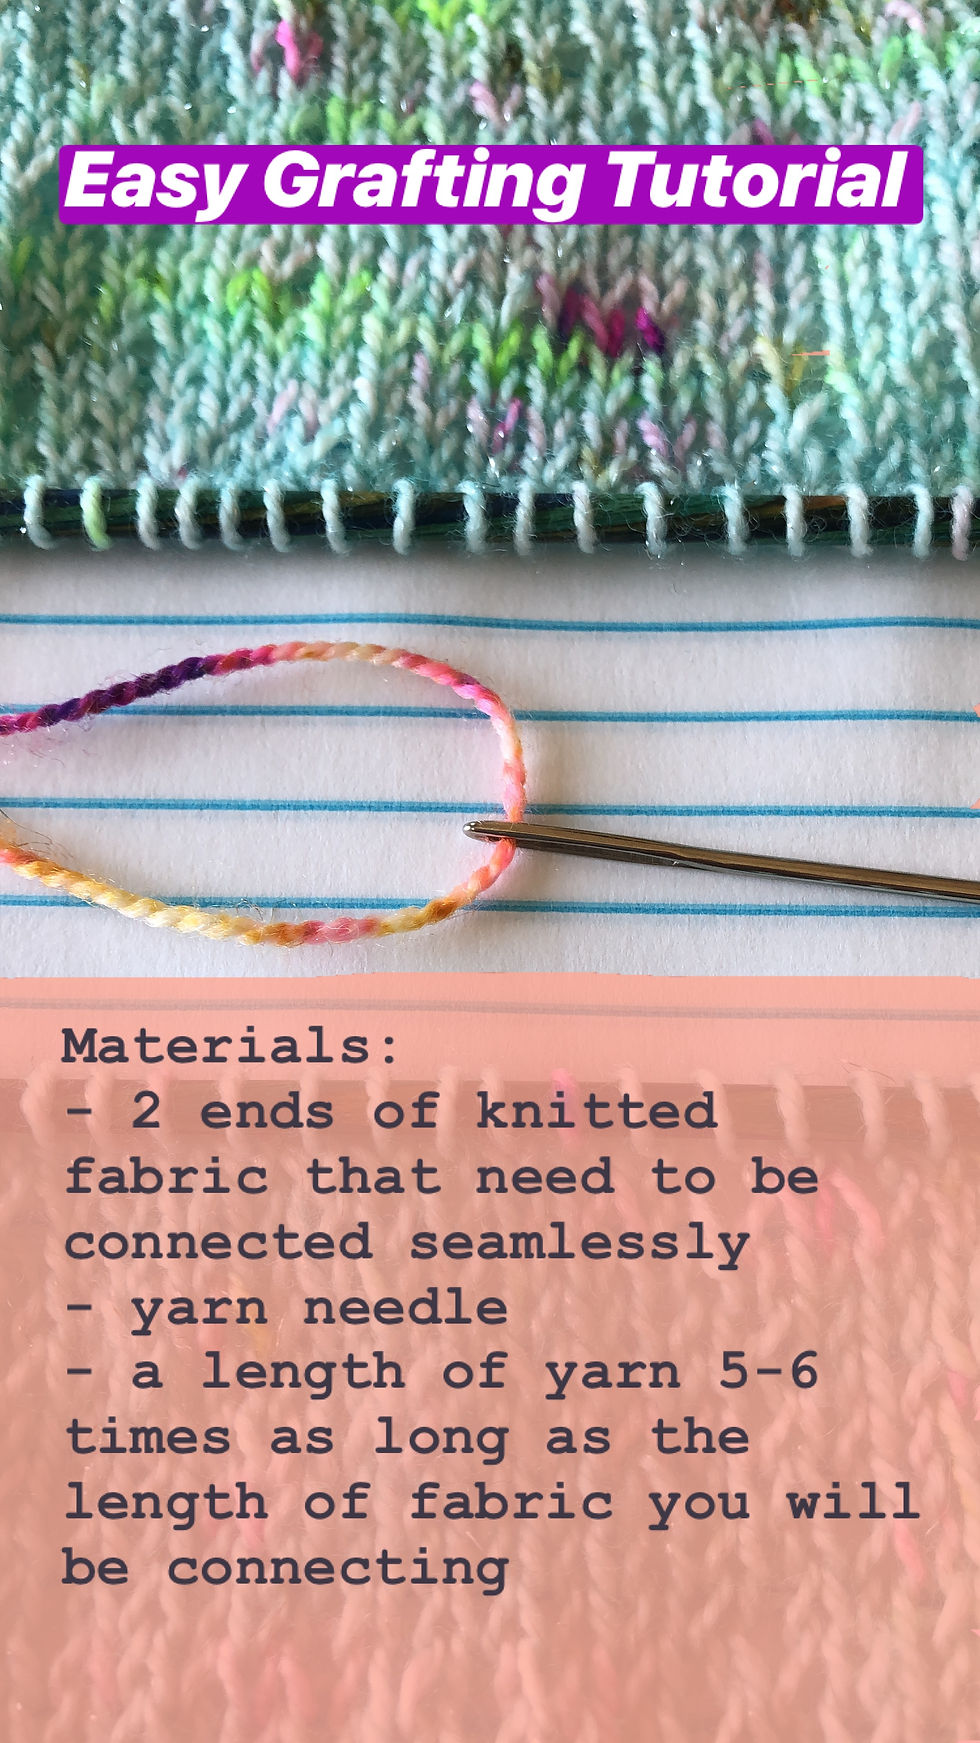
2 ends of knitted fabric that need to be connected seamlessly (live stitches)
Yarn Needle
A length of yarn 5-6 times as long as the length of fabric you will be connecting

Featured Yarns in this Tutorial
(Main Color) Wee Chickadee Woolery’s Sparkle Sock in Dewdrop (Fingering-weight)
(Secondary Color) Wee Chickadee Woolery's Sparkle Sock in You're a Peach! (Fingering-weight)
Easy Grafting/Kitchener Stitch Tutorial:

Step 1: Start with wrong sides of fabric facing & with your working yarn coming off the right-hand side of the back needle.

Step 2: With the yarn needle, insert in the first stitch on the front needle as if to purl.
Tip: The yarn needle tip will be facing left. (This is always true for working a purl stitch.)

Step 3: Pull the yarn needle and yarn through, leaving the stitch on the knitting needle.

Step 4: With the yarn needle, insert in the first stitch on the back needle as if to knit.
Tip: The yarn needle tip will be facing right. (This is always true for working a knit stitch.)

Step 5: Pull the yarn needle and yarn through, leaving the stitch on the knitting needle.
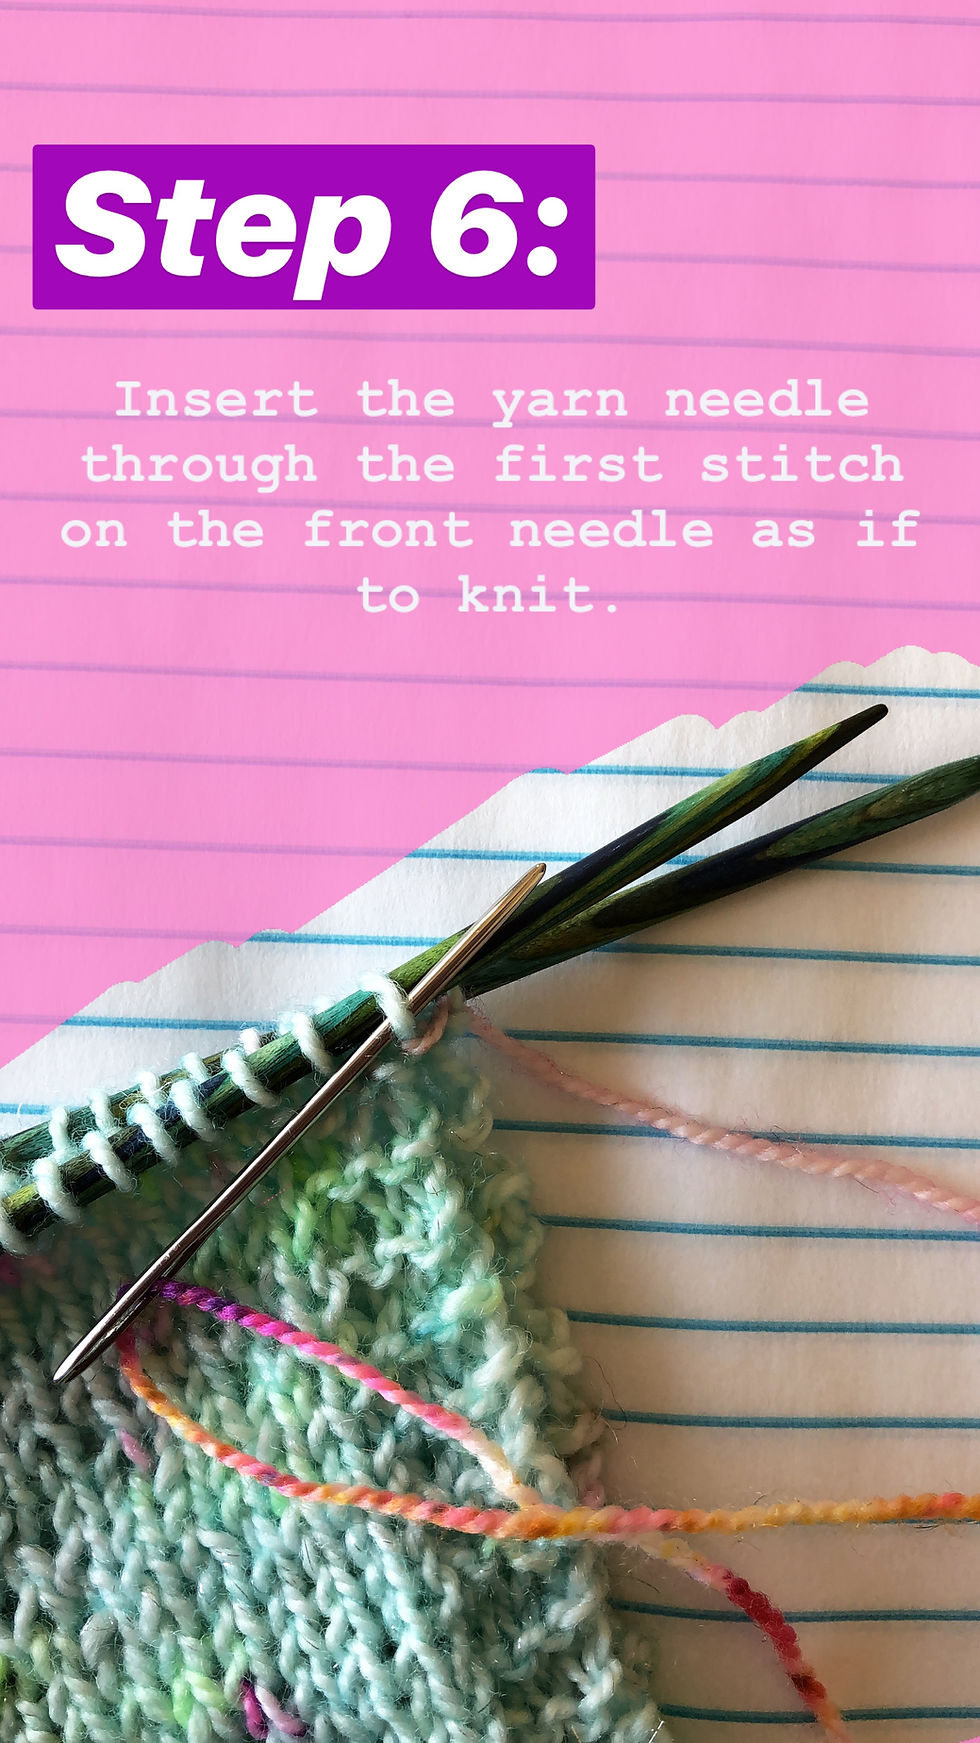
Step 6: Insert the yarn needle through the first stitch on the front needle as if to knit.

Step 7: Slip the stitch off the knitting needle & onto the yarn needle. Insert the yarn needle into the next stitch purlwise.
Tip: "Purlwise" is just another way of saying "as if to purl".
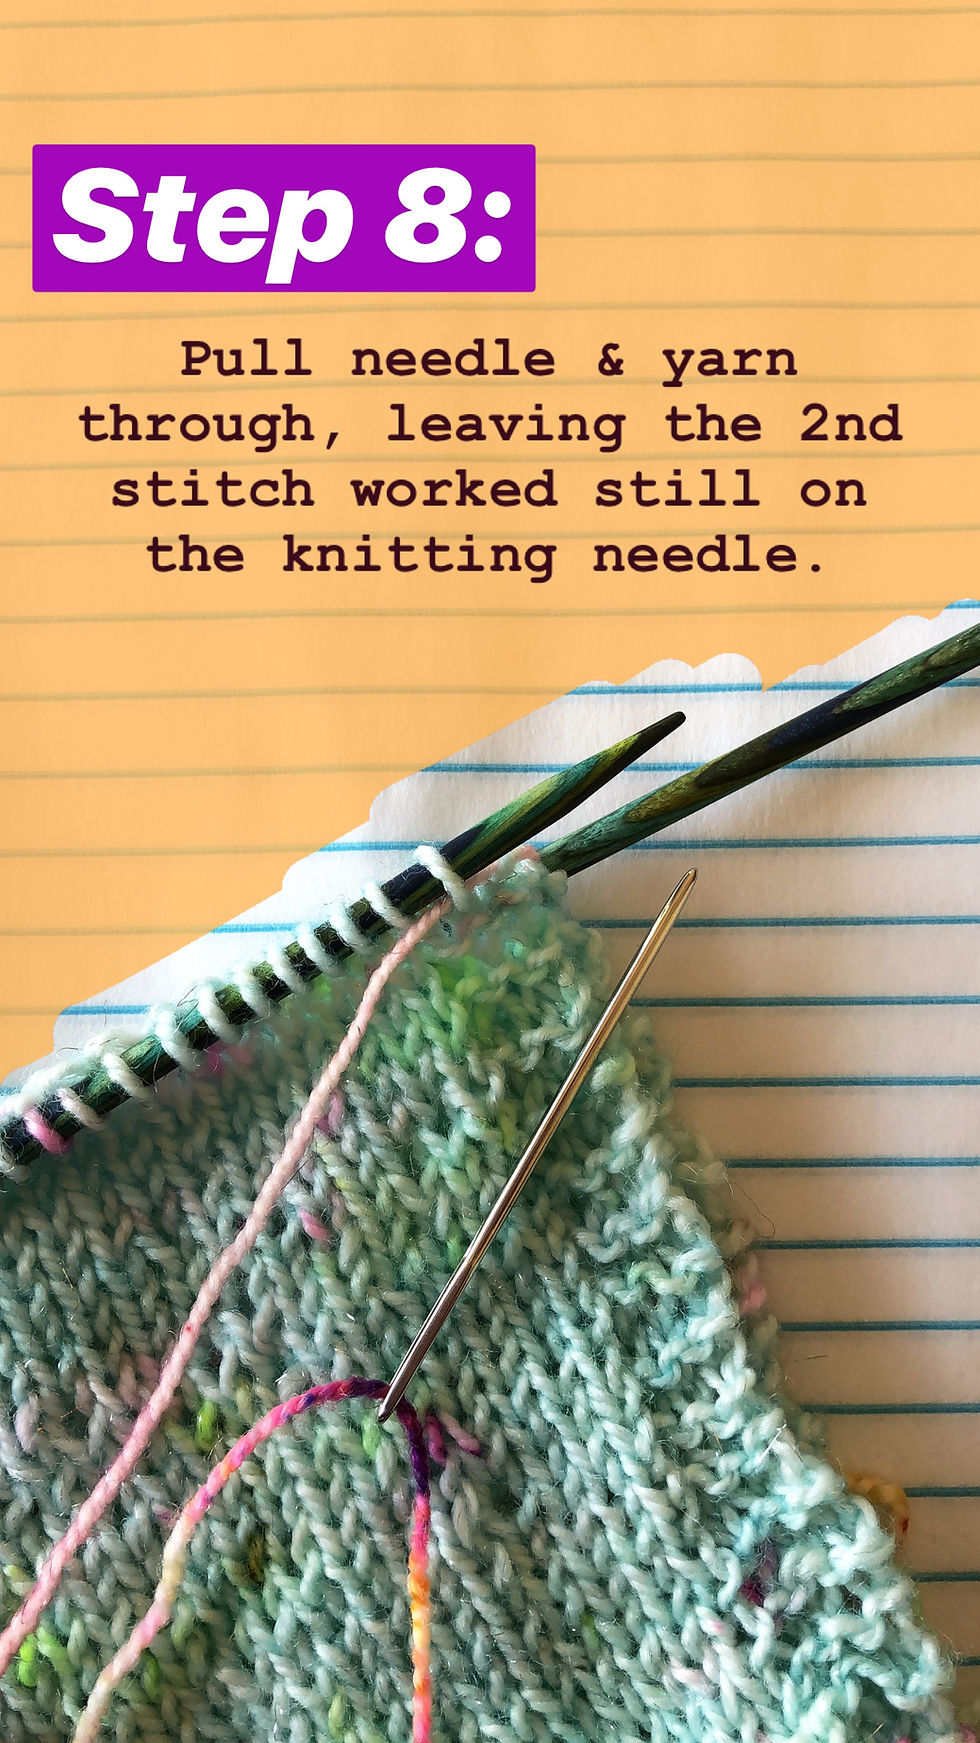
Step 8: Pull needle and yarn through, leaving the 2nd stitch worked still on the knitting needle.
Tip: Once you've done steps 6-11 a few times, you should be able to treat steps 6-8 almost as one motion so the only part you need to keep track of is how to start step 6. See the Tip in Step 12 for how to keep this straight.

Step 9: Insert the yarn needle through the first stitch on the back needle as if to purl.
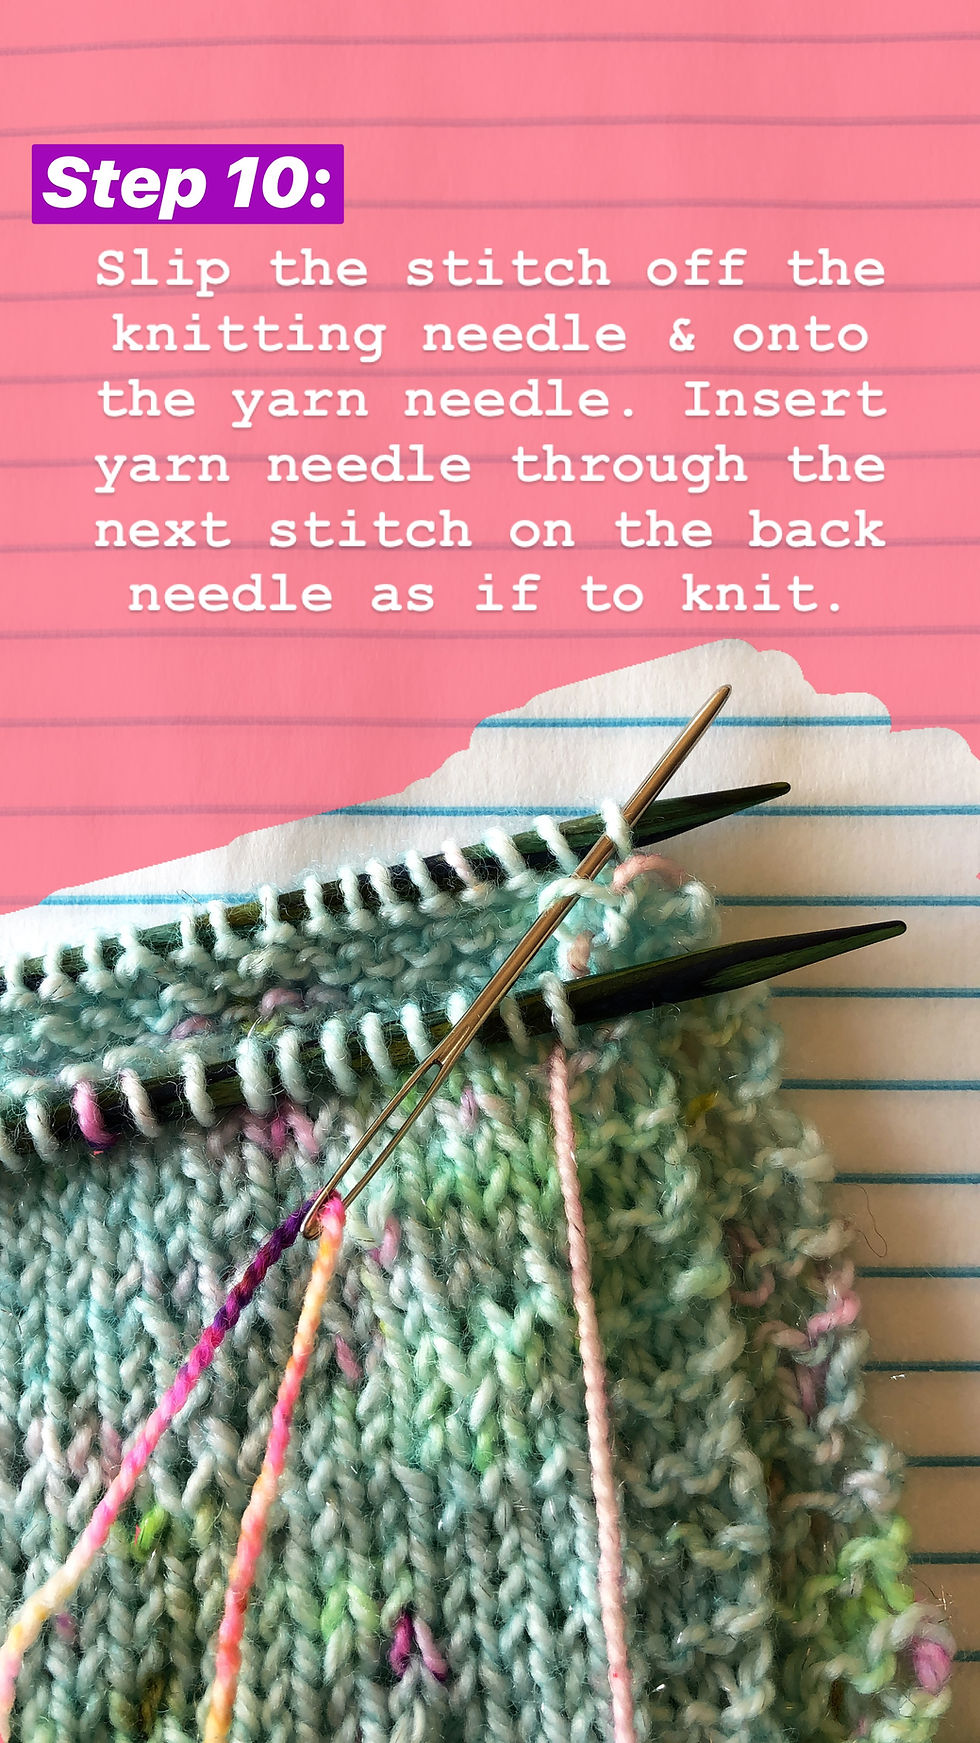
Step 10: Slip the stitch off the knitting needle & onto the yarn needle. Insert the yarn needle into the next stitch knitwise.
Tip: "Knitwise" is just another way of saying "as if to knit".

Step 11: Pull needle and yarn through, leaving the 2nd stitch worked still on the knitting needle.
Tip: Once you've done steps 6-11 a few times, you should be able to treat steps 9-11 almost as one motion so the only part you need to keep track of is how to start step 6. See the Tip in Step 12 for how to keep this straight.

Step 12: Repeat steps 6-11 until all stitches have been grafted together.
Tip: To remember if you work the first stitch in the repeat knitwise or purlwise, just look at the fabric that is facing you. If you're working stitches on the front needle, you should have a smooth fabric facing you so you want to work the first stitch as if to knit so that it matches the fabric. Likewise, if you're working stitches on the back needle, you should have the purl bumps facing you so you'll want to work the first stitch purlwise to match the fabric.
Tip: The second stitch is always worked the opposite of the first stitch and stays on the knitting needle. (So, if you just worked the first stitch purlwise, you will work the second stitch knitwise.)
Try It Out!
It's best to put a new technique into practice right away so that you can remember it in the future. Here are some of my patterns that feature grafting/kitchener stitch:


Kawaii Band